I love thrumming, and I love the resulting thrummed projects. They are easy to make, soft, and create a very warm fabric. This is one of my favorite ways of getting my knit accessories to another level of warmth! I just finished knitting these very warm mittens, they are made in Fair Isle, with a double layer ribbing at wrist and they are filled with thrums made of wool roving. They are called the Icy Trails Mittens and the pattern is available on Ravelry if you like them!
To share this awesome technique with you, here’s a little tutorial to show you how to make thrums with wool roving.
First, here’s a video tutorial to learn thrumming:
And here’s a more detailed photo tutorial:
First thing you’ll need for thrumming is some wool roving. You can get some in any color you fancy from brick and mortars or online shops. You can also dye your own! The roving I use for this tutorial comes from KnitPicks.
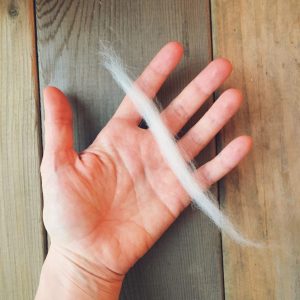
Take out a strand of roving. You should never have to cut the wool. By softly pulling in the fiber direction, you’ll get tinier bits. It doesn’t need to be a precise lenght or thickness, but I like using roving strands of about 6″ long by 1/2″ wide. You can experience to find your favorite size.
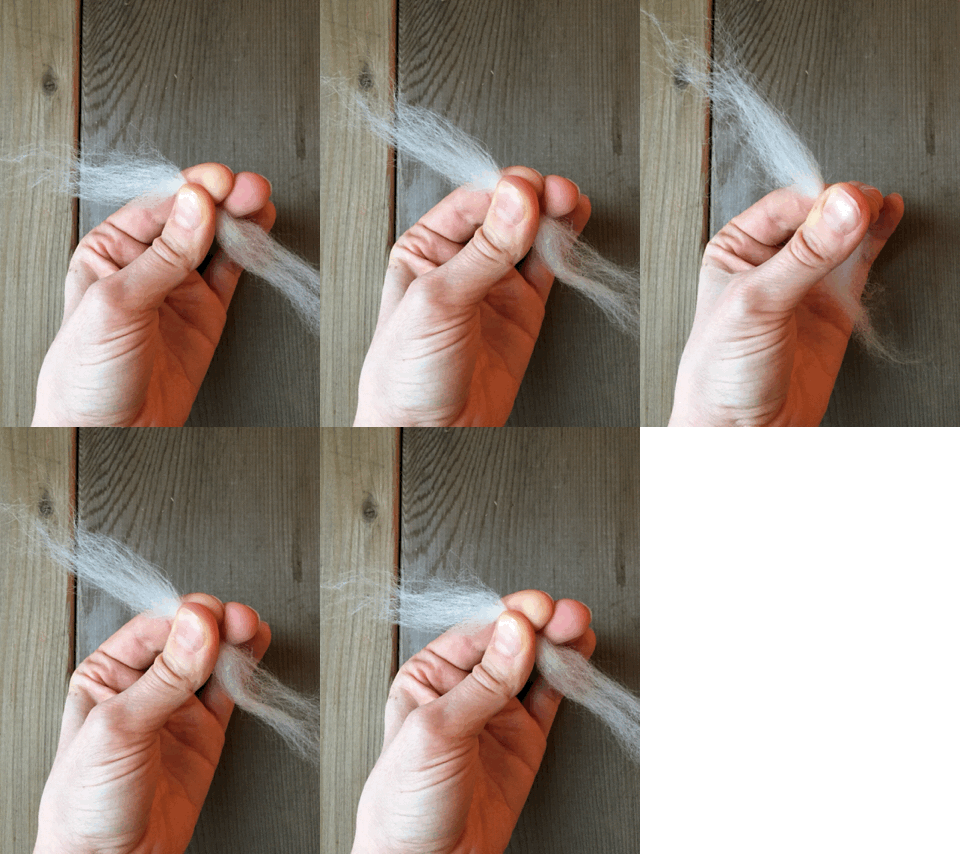
Hold the middle of the strand of roving between your thumb and index and roll it between your fingers, so the middle part becomes slimmer and harder.
Wrap one end of the strand around your index and hold it between your middle finger and thumb.
Then, wrap the other end around your middle finger and with your other hand, hold the part that’s between your fingers.
Get all the tiny strands that are poping out into the middle part by rubbing and rolling it between your fingers.
Keep on rubbing the midddle part until it becomes dense enough so you are confident it won’t loose out. The middle is the part that will go on the needle when you knit a stitch with the thrum, so it will be easier to knit if it looks and feel like yarn!
Knitting with thrums
Here’s a video tutorial, so you can see it in action!
And now, the detailed photo tutorial:
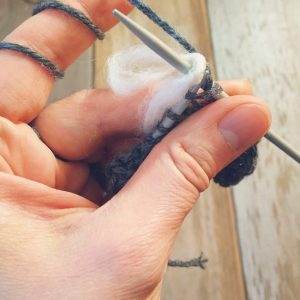
Get to the stitch where you want to add a thrum. Wrap your yarn around the needle and place the thrumb of the left side of the yarn, around the needle.
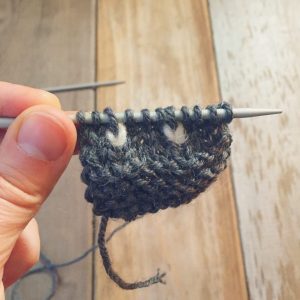
When you release the stitch, you’ll have a strand of yarn immediately followed by a thrum on your right needle.
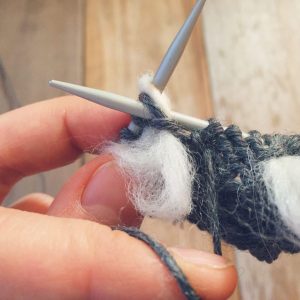
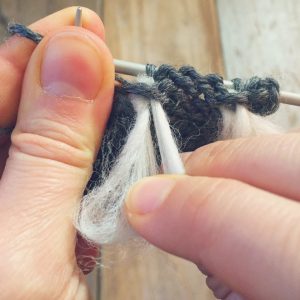
On the next row, when you get to the thrum, you will knit together the thrum and the yarn. If you’re working in the round, the yarn will be first on the needle and the thrum will be next. If you’re working in rows, the thrum will be first and the yarn will be next (pictured).
The thrum will hang on the wrong side of the knitting. Pull on the loops to secure them, making sure both loops are hanging on the wrong side.
Et voilà! You made it!


