The first thing I wondered when I started knitting was “how do I start my knitting project”? I quickly learned that starting a knitting project was called casting on and that there were many many ways to do it. I first learned this cast on technique called “long tail cast on” and it is still the one that I use the most, because once you get the hang of it, it is pretty easy to make, but mostly because it creates a beautiful, sturdy result.
You can watch this video to see how I do it. It is followed by a step-by-step photo tutorial.
Now that you have an idea of how it’s done, let’s learn the long tail cast on!
 You will need:
– The yarn you want to use for your project (the yarn I’m using is Paintbox Yarn Simply DK, colorway: mustard yellow)
– One of the knitting needle you’ll use for your project
 Preliminary step 1:
Take some yarn out of the ball. This will be the actual long tail. It’s tricky to guess the correct length to use, but if you plan 1″ per stitch you are going to cast on, you should be fine. This trick should work with any yarn weight smaller than heavy worsted. For heavier weight, I’d recommend adding a bit of length to the tail. As you can see, I’m planning to cast on 10 stitches.
Make a slipknot at this point.
 Preliminary step 2:
Place the needle in the slipknot, and pull on the yarn so it stays put.
 Preliminary step 3:
Take the yarn attached to the ball and hold it with your four fingers. Preliminary step 4:
Take the long tail and hold it only with your two small fingers. Preliminary step 5:
Using your thumb, stretch the long tail far from the yarn from the ball. At this point, you have 3 strands of yarn around your fingers:
1- the yarn attached to the ball
2- the section of the long tail over the thumb and close to the needle
3- the section of the long tail between the thumb and fingers
Let’s start casting on stitches with the long tail cast on method!
 Step 1
Bring the needle forward and then under strand 3, picking up strand 3.
 Step 2
With strand 3 on the needle, bring it up and above strand 2.
 Step 3
Bring the needle around strand 1 by going above, then behind and then under.
Strand 1 will be wrapped around the needle.
 Step 4
Move your thumb behind to pass the needle through the loop made with strands 2 and 3. Release both strands by removing your thumb from the loop. Strand 1 will stay on the needle.
 Step 5
Use your thumb to pull the long tail (the strand held only by the small fingers) towards you. The loop around the other strand will get tight under the needle.
 Congrats! You have cast on a stitch!
Make sure your yarn and fingers are at the right place, and repeat steps 1 to 5 as many times as needed to create the number of stitches required for your project. Note that the slipknot will count as the first stitch.
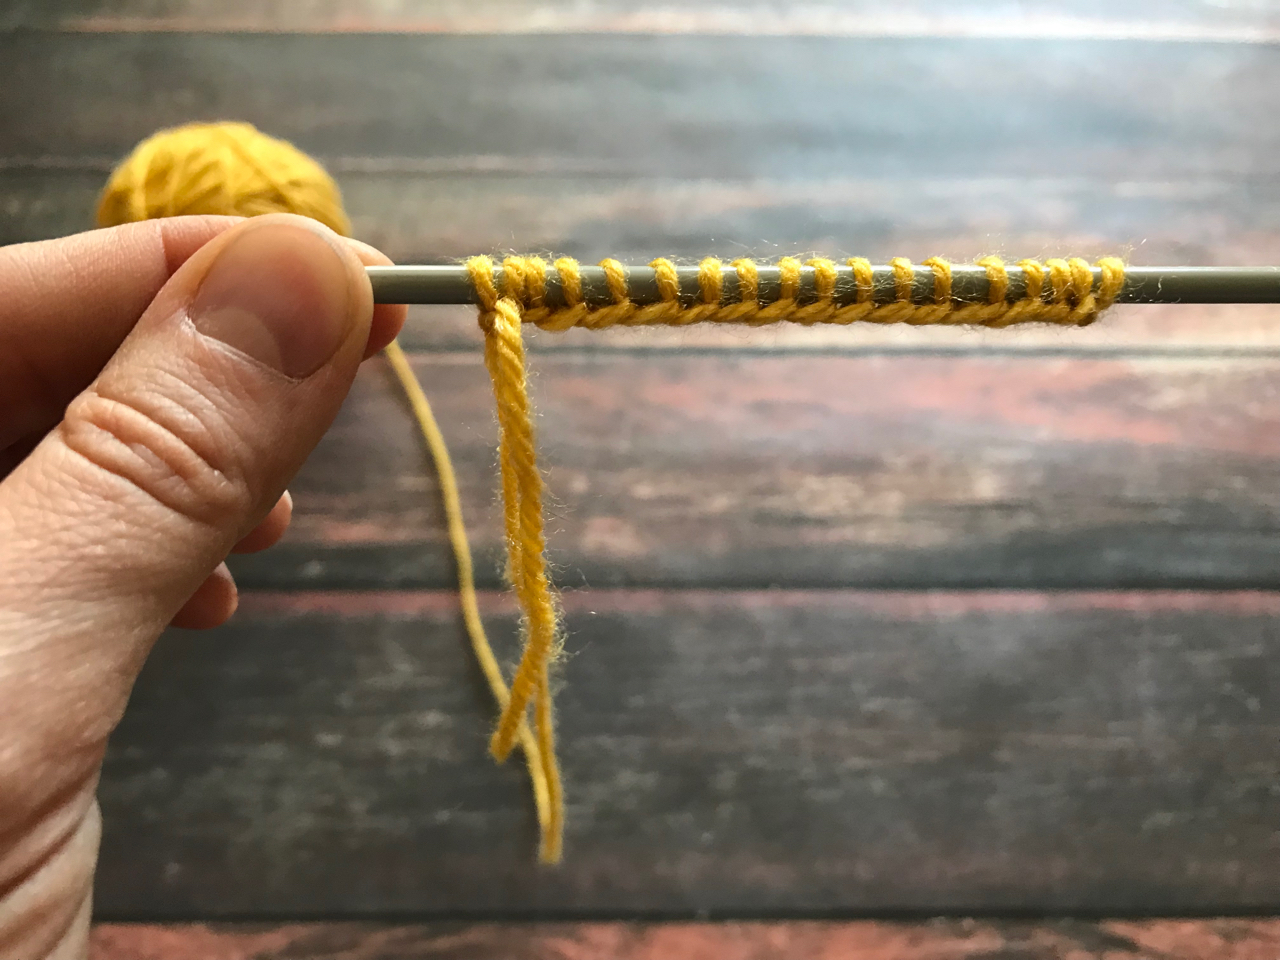 As you can see the result is quite sturdy and looks a lot like stitches. On the front it looks like knit stitches…

…and on the back it looks like purl stitches.